

October 7, 2026
A kitchen that gets used every day and has gone about a year without a deep clean does not have one big problem. It has a layer of grease that has settled on everything around the stove, from the cooktop up to the cabinet fronts. That was the starting point in this Kirkland home of about 1,800 sq ft. The homeowners cook daily and asked for a deep clean of the kitchen.
With grease spread across several surfaces, the order of work decides how the job goes. Here is the sequence the cleaner followed.
Step 1: Walk the zone and look up
Before any product came out, the cleaner went over the area around the stove from the floor to the top of the upper cabinets. The findings:
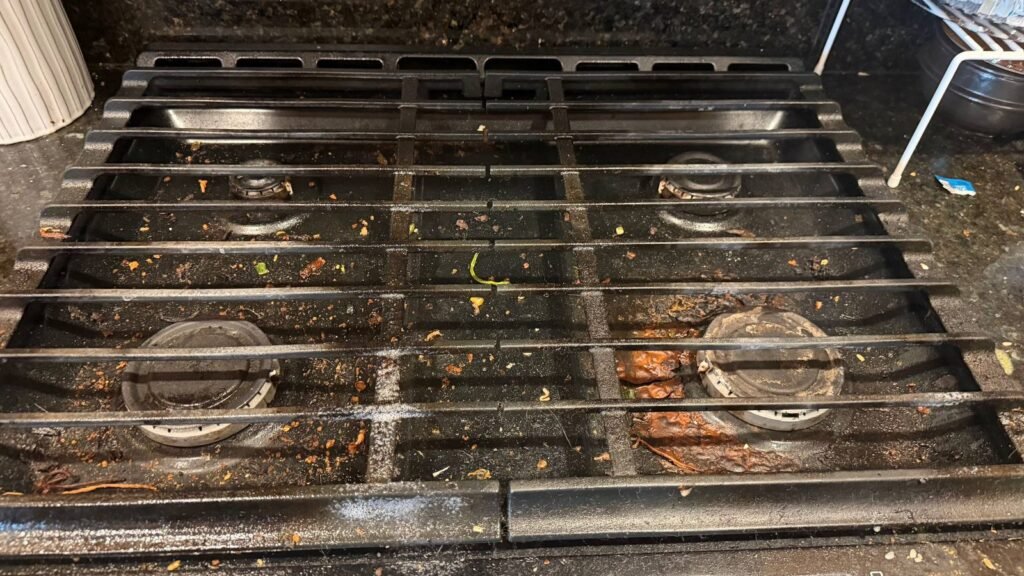
- Cooktop. Cast-iron grates over a black gas cooktop, with crumbs caught between the bars and baked-on grease around the burner bowls, including rust-orange patches where sauce had cooked onto the surface.
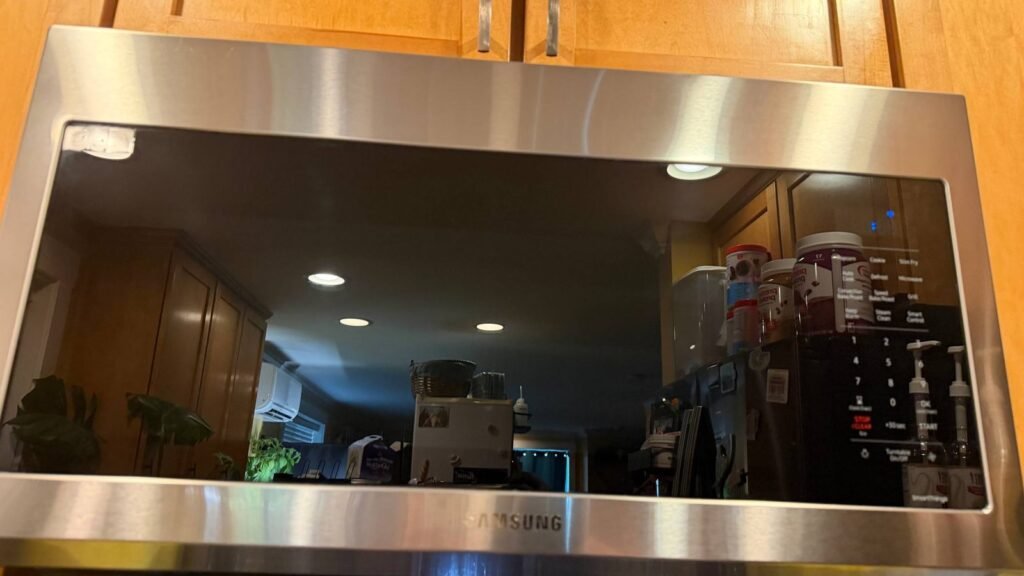
- Over-the-range microwave. A dull film of grease and speckled splatter across the black door, the stainless frame and the control panel. The vent grille on top was clogged with dust stuck to grease.
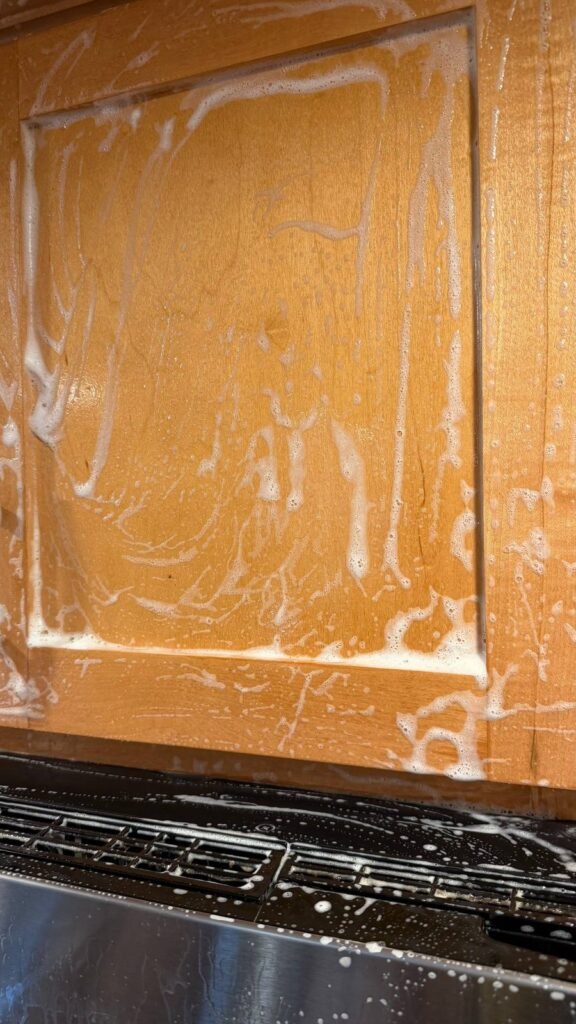
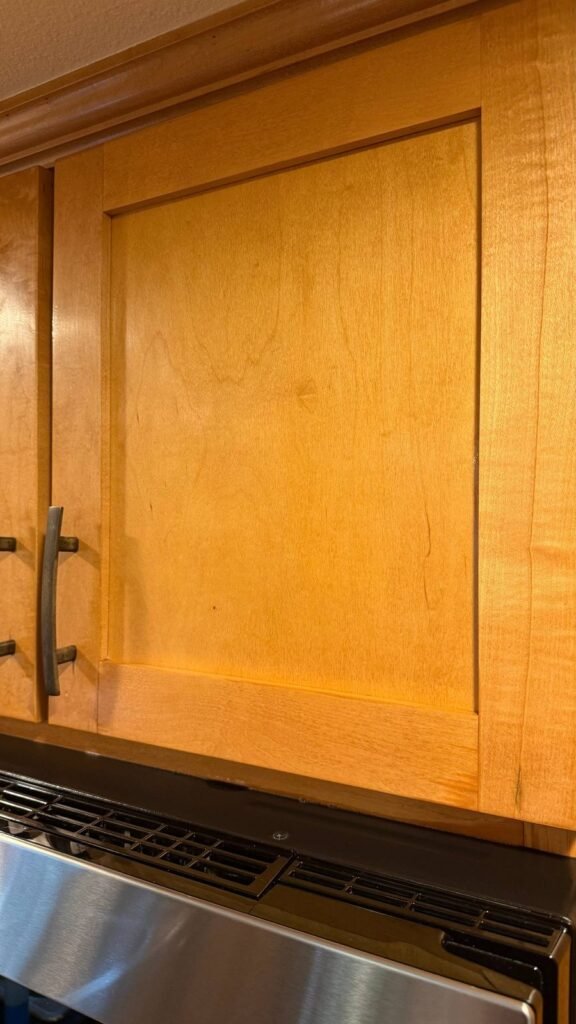
- Wood cabinet fronts above the stove. Tacky to the touch, with dark specks along the edges of the recessed panels where grease and dust meet.
- Window blinds. Dust on every slat.
Grease rises with cooking steam, so the worst of it was not on the cooktop but on the surfaces directly above it.
Step 2: Grates off and soaking
The cast-iron grates came off first and were washed separately in the sink with a degreaser and a stiff brush. Taking them off at the start gives the baked-on grease time to soften while the rest of the work goes on, and it clears the cooktop surface.
Step 3: Work from the top down
Anything cleaned above the stove drips, so the order ran top to bottom: cabinet fronts, then the microwave, then the cooktop last.
Wood cabinet fronts. Wood cannot be treated like steel. A strong degreaser can dull or strip a finish, so the fronts were cleaned with a foam cleaner made for wood. The foam clings to a vertical door instead of running off, which gives it time to loosen the sticky layer. It was worked over the flat panel and into the corners of the frame, then rinsed off with a damp cloth and dried right away so no moisture stayed on the wood.
Microwave exterior. Next came the over-the-range microwave: the top vent grille, the stainless frame, the glass door and the control panel. The panel was cleaned with a barely damp cloth, since liquid should never run into the buttons, and the stainless and glass were buffed dry until the door reflected the room clearly.
Cooktop. With nothing left to drip onto it, the cooktop was degreased around each burner, the burner caps were wiped, and the crumbs and cooked-on patches were cleared. The clean grates went back on dry.
Step 4: The blinds, slat by slat
Blinds are the last step because dusting them sends particles down onto the counters below. Each slat was wiped individually rather than run over with a duster, which only moves the dust along. It is slow, but on kitchen blinds dust often sits on a light film of grease and a quick pass leaves streaks.
Step 5: Final check
The last pass goes back over the whole zone: the edges of the cabinet doors, the handle area, the top of the microwave and the counter below it, where drips from the steps above can land.
What made it work
The order. Cleaning the cooktop first would have meant cleaning it twice. Using a degreaser on the wood would have risked the finish. The steps above are what JenyClean cleaners learn in a 10-day onboarding with a supervisor and follow from room-by-room checklists, and every job comes with a free re-clean within 24 hours if something was missed.
If your kitchen has had a year of daily cooking without a deep clean, we can reset it. Book online to schedule kitchen deep cleaning in Kirkland.